
The blending modes feature is one of Photoshop’s most undervalued tools for Photographers. Blending modes can be used to alter the ways in which each layer interacts with the layers below it, allowing for endless possibilities when it comes to setting the right tone or adding artificial lighting.

Graphic designers and digital illustrators use blending modes all the time to create interesting lighting effects or textures; however, most digital photographers don’t realize that blending modes can be useful when working with photographs, too. The right combination of blending modes can set a dramatic tone that is otherwise difficult to achieve.
This guide explain the properties of each blending mode as well as deliver a few creative tips that will help you use this feature to its full potential.
How to Easily Adjust Blending Modes
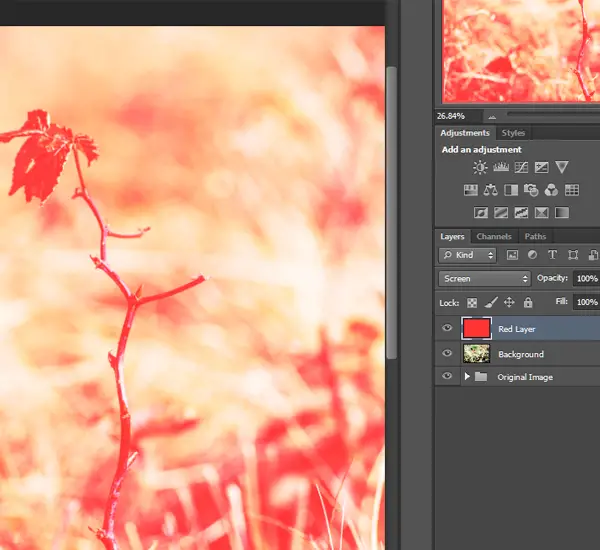
1. Open up a document with two layers. Alternatively, you can duplicate the background layer, and work with the copy layer. Head over to the Layers window. Click the drop-down menu that currently says “Normal.” Here you will find the blending modes menu. Click the mode of your choice to apply it to the layer.

2. To quickly and easily experiment with each blending mode, hold Shift and press + to go up one step in the list and – to go down. You can also double-click inside the blending mode box, and then use the up and down arrows or scroll wheel on your mouse to move through the list.
I chose to create a new layer and fill it with red. I then scrolled through the blending modes to find one with an appealing effect.


Blending Mode Cheat Sheet
In this section, you will find a simplified description of each blending mode derived from help.adobe.com. You can use this section as a reference while you work, or you can read through it to get a better understanding of what actually happens when you select each blending mode.
Normal Blending Modes
This category contains only two blending modes?the default mode, Normal, and Dissolve.
Normal
This is the default blending mode. Only the top layer is used.

Resulting Appearance: Grainy, harsh, and pixelated.
Behind the Scenes: Random pixels are taken from both layers, and no anti-aliasing is used. Dissolve layers with a higher opacity will contain more pixels from the top layer, and dissolve layers with a lower opacity will contain more pixels from the layer below.

Darken
Resulting Appearance: The colors appear uniformly darker.
Behind the Scenes: The values in the color channels are decreased.

Resulting Appearance: The image appears darker and more vivid.
Behind the Scenes: The color channel values in the top and bottom layer are multiplied together. A few extra rules apply as well: the resulting colors won’t be brighter than the original colors; if either color being multiplied is black, the resulting color will be black; and if either color being multiplied is white, the other color will be the resulting color.

Resulting Appearance: Darker colors and increased contrast. The color White does not change.
Behind the Scenes: The source color is darkened and the contrast is increased. Pure white is not affected.

Resulting Appearance: Darker colors. The image does not change if blended with white.
Behind the Scenes: The color values are inverted, added together, and then inverted again.


Resulting Appearance: The colors appear darker.
Behind the Scenes: Each color value is lowered, but not within each individual color channel.

Lighten
()
发表回复