If you are considering the switch from Photoshop to Affinity Photo, you might wonder how it will affect your photo editing workflow. And how will just a tiny loss in features (for a big drop in price) affect your options for photo editing?

Keep on reading to find out how your workflow will change, what you will miss and what you will gain when switching to Affinity Photo.

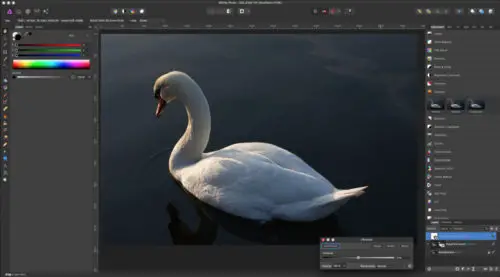
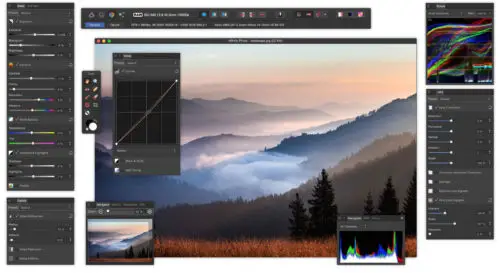
At a glance, the interface in Affinity Photo might look very much different, but when you take a closer look, it is very much like Photoshop. You got the layer and channel panels, history panel, adjustments panel and all the other things you already know from Photoshop.

The main difference in the user interface is that Affinity Photo is divided into four workspaces called personas. The benefit of dividing the user interface into several workspaces is that you to a greater extent is only shown features when you need them.
I.e. you don’t need to see the tone-mapping features or the liquify tools unless you switch to these workspaces. You also don’t need to see all the export settings, unless you are at that stage in your workflow.
Photoshop also has workspaces, but from a normal user’s point of view, you don’t switch between them as part of your standard workflow in Photoshop.

Understanding the Personas in Affinity Photo
Here a short explanation of each persona or workspace:
The Photo persona (default) is where you do most of your photo editing.
The Liquify persona is where you have the advanced transform tools that allow you to make a model look slimmer and so on.
The Develop persona is the same as Adobe Camera Raw. If you open a raw file in Affinity Photo you are initially taken to the Develop persona, so you can tell Affinity Photo how it should interpret the raw-file.

The Export persona give you all the option for exporting, slicing and resizing your photos in one single workspace.
The Tonemapping persona is where you create your HDR photo (unless you prefer to blend the exposures manually).
If you just get to know the personas and know which things you can do where much of the underlying feature options will look very similar to Photoshop. Affinity Photo is a little simpler and user-friendly, but very powerful. With some features, you can do more in Affinity Photo than in Photoshop, and in other areas, it is the other way around. I.e. if you use the Vignette Filter in Affinity Photo, you cannot change the midpoint of the vignette as you can with Photoshop’s Lens Correction Tool. However, you get control over the scale and shape of the vignette to a higher degree than you do in Photoshop.
Both Photoshop and Affinity Photo let’s you create a vignette manually using a marquee tool and invert the selection and then applying i.e. a brightness/contrast adjustment layer. In this way, they function in the same way. You will find that the main difference is in the underlying sliders that come with an adjustment layer. For some features, you get more or less control with Affinity Photo compared to Photoshop. But these differences are easy to get used to as you can view the effect of the sliders right away.
How Will Switching Affect Your Workflow?
Once Affinity Photo is installed, you can open it from any photo library app, like Lightroom. So it is easy to go from your photo library manager to Affinity Photo. However, you cannot open multiple images as layers in Affinity Photo from Lightroom as you normally would when using Photoshop.
Instead, you need to open up Affinity Photo and go to File > Open Stack and then select the images you want to work with in Affinity Photo.
Affinity Photo Macros vs. Photoshop Actions
Saving a series of steps that you do over and over again is known as actions in Photoshop. They can be a real timesaver. Affinity Photo 1.5 added support for macros which is the same thing as actions. There are still a few limitations to what you can record as macros. However, it is a valuable addition to Affinity Photo. Until now there are only a few free macros available, and a Premium Affinity Photo Macro Pack.
Affinity Photo Supports Photoshop Plugins
You can get Photoshop Plugins, like Nik Collection to work with Affinity Photo. However, you might need to re-install Nik Collection Plugins and set it up for working Affinity Photo.
Once installed it works flawlessly, with the change that the plugin effect is applied to the active layer instead of new layers, as Photoshop users are used to.
Live Filters vs. Smart Filters
If you are used to using Smart Filters in Photoshop, you will not be disappointed with Affinity Photo. In Affinity Photo it is just called Live filters, as you can apply any several filters to your photos in a non-destructive and continue to adjust them throughout your workflow.

Affinity Photo Focus Stacking Leaves Room for Improvement
If you use focus stacking, you might find it hard to give up Photoshop, as focus stacking in Affinity Photo is not up to speed. I.e. the initial stacking is not nearly as well performed as in Photoshop, but worse Affinity Photo doesn’t reveal the layer masks so you can correct the focus stack, by just masking in another layer. The focus stacking feature in Affinity Photo only outputs the resulting layer.
However, if you don’t use focus stacking in your daily work, there is no need to bring this lack into the equation, or you could use a dedicated focus stacking software like Helicon Focus instead. It is also likely that the focus stacking feature will improve in the next version of Affinity Photo.
()

发表回复