
Welcome back to the Retouching with Cloning Tools series! In Part 1, you learned about how cloning tools are used to retouch and remove imperfections from images.

In this part of the series, you will learn more about the specific differences between each cloning tool, what kind of jobs they work best for, and how to use them. By the end of this article, you’ll be able to pick the right tool for the task!Let’s get started!
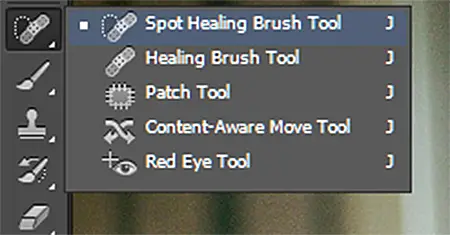
1. Spot Healing Brush Tool
Cheat Sheet:
Adobe.com Definition: “…quickly removes blemishes and other imperfections… automatically samples from around the retouched area.”
Useful for: Getting rid of spots, dust, scratches, blemishes, and tiny imperfections.
Pros: You don’t have to do any sampling–the tool samples from nearby areas automatically. It is also very simple to use, and it works instantly.
Cons: Merges and blurs details together, so you can’t use it on heterogeneous surfaces.
How to use it: Click or draw over the area you want to fix. No, really, that’s it! Just be sure to make the changes on a new layer, and select “sample all layers” at the top.


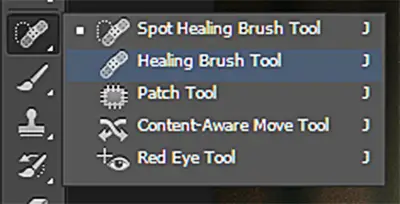
2. Healing Brush Tool
Cheat Sheet:
Adobe.com Definition: “…lets you correct imperfections, causing them to disappear into the surrounding image… [the Healing Brush Tool] matches the texture, lighting, transparency, and shading of the sampled pixels to the pixels being healed.”
Useful for: Removing more complicated imperfections that require sampling.
()
发表回复