One of the easiest and most common techniques that photographers use to make their photos look more interesting and professional is to use a shallow depth of field. Depth of field refers to the distance between the nearest and farthest parts of an image that appear sharp or in focus. When a photo has a shallow depth of field, only a small portion is in focus, while the rest is blurry.
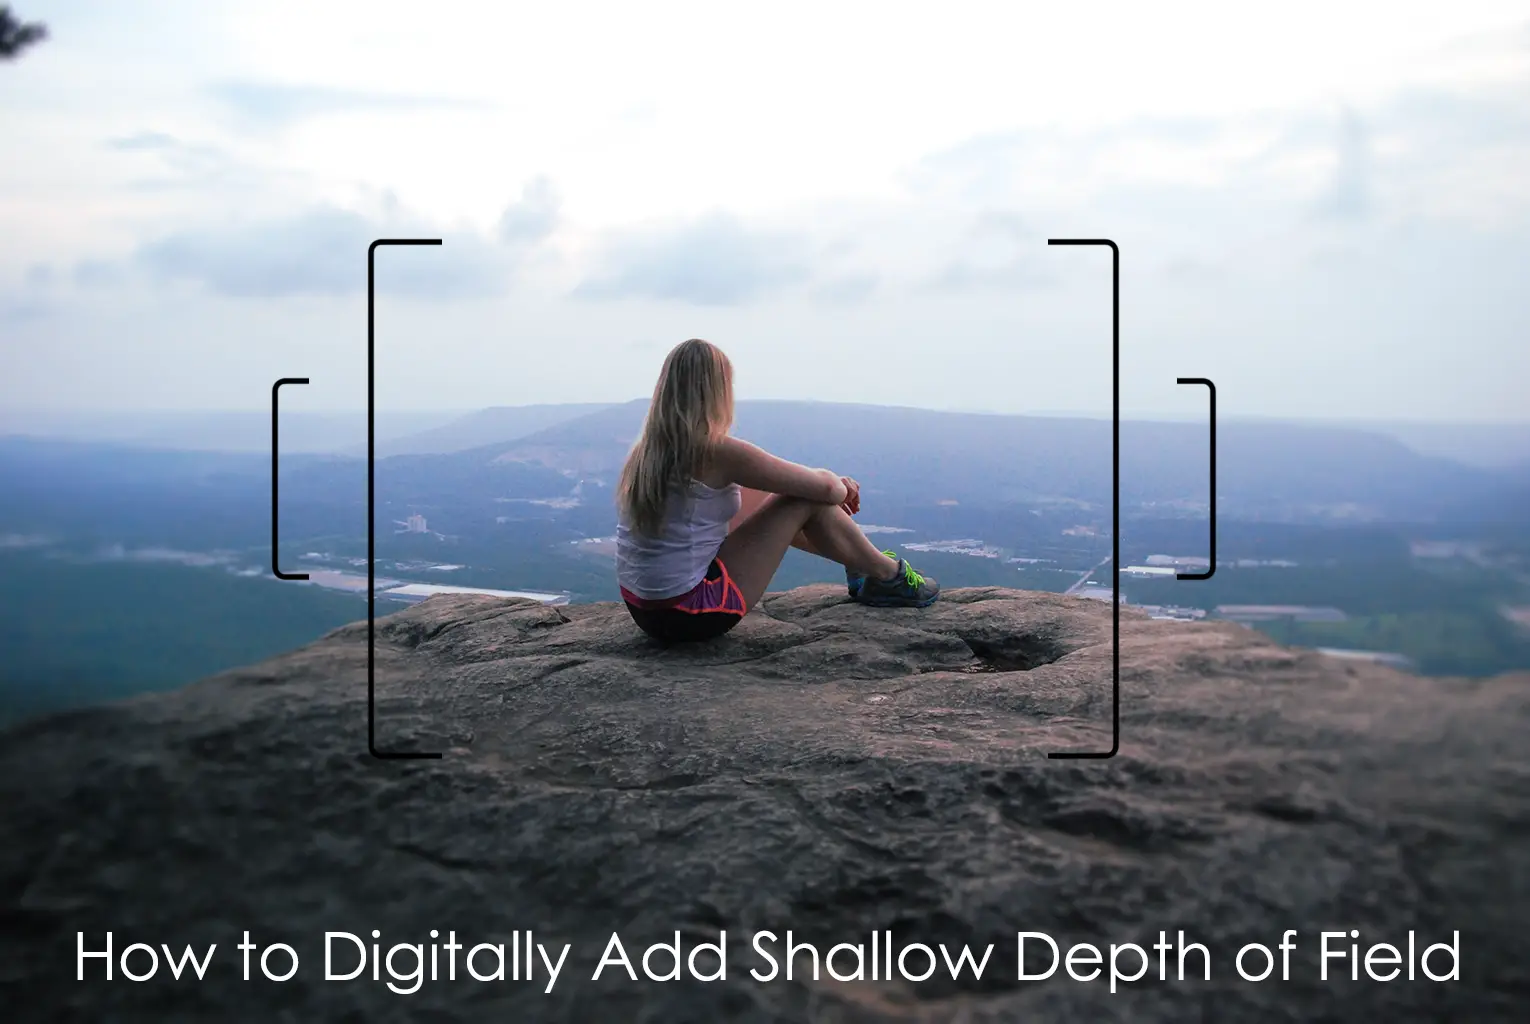
It may seem a bit counter-intuitive that photographers purposefully create mostly-blurred photographs; however the shallow depth of field effect is actually closer to the way we see with our eyes. As you look at this page, for example, only the text is in focus, while everything else in your vision blurry.
Taking photographs that have shallow depth of field usually requires a nice lens, or at least, an expensive camera. However, it is possible to digitally simulate shallow depth of field using Adobe Photoshop.This tutorial will show you how to add visual interest to your photographs by creating a shallow depth of field effect using 3 different techniques: the Iris Blur tool, the Lens Blur Filter & Depth Maps, and Photoshop Plugins.
Method 1: Iris Blur
The Iris Blur tool is the quickest way to give your photographs the appearance of shallow depth of field. This technique does not offer as much customization as the other two methods; however, it does a pretty good job, and it only takes about 2 minutes.
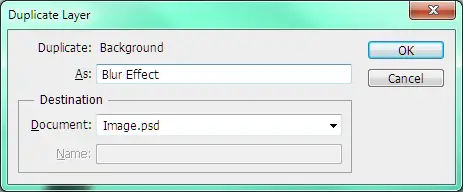
Step 1: Right-click the layer “Background” in the Layer’s box. Select “Duplicate Layer” and name the new layer “Blur Effect.”
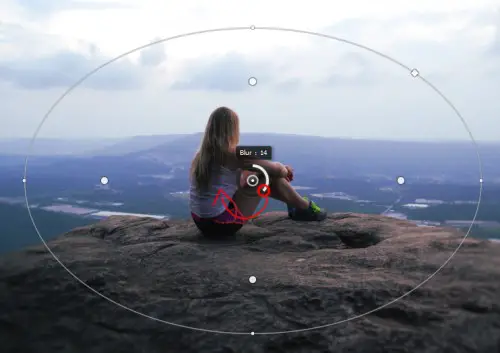
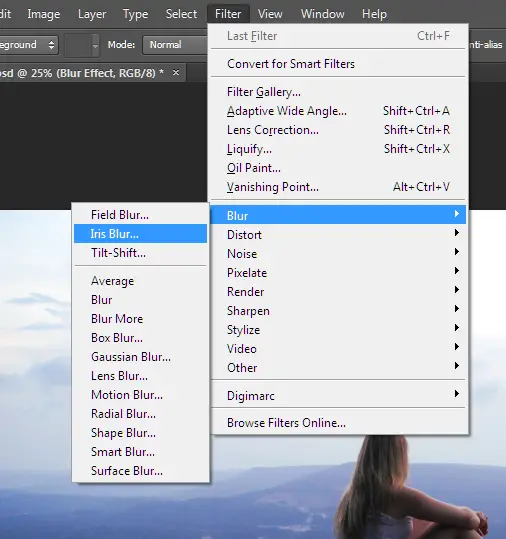
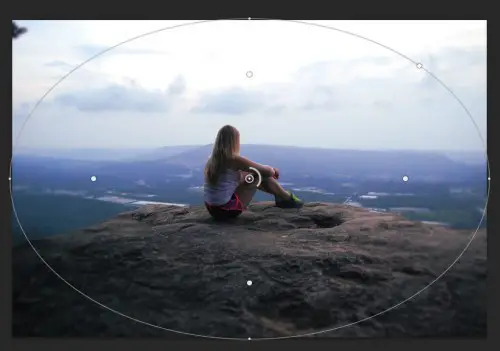
Step 2: Select Filter > Blur > Iris Blur This will open the Blur Gallery tool with the Iris Blur tool selected and a default Iris Blur will be placed on your image. Move the circle in the center to the part of your image that you want to stay sharp. For my photo, I wanted the young woman and the edge of the cliff to remain in focus.
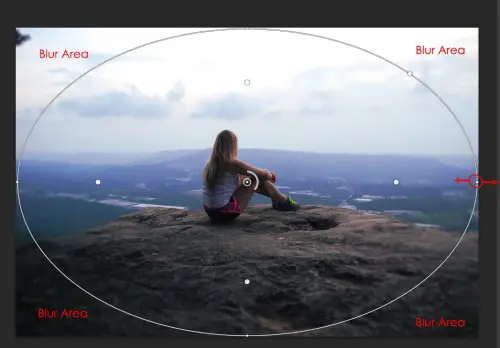
Step 3: Click and drag the outer edge of the selection to change the size of the blur. Click outside of the selection and drag diagonally to rotate the selection. Everything outside of the selection is called the “Blur Area,” since this part of the image will receive the full intensity of the blur effect. If you want more of your photo to be intensely blurred, make the selection smaller and the area outside of the selection bigger. Make the selection touch the edges of your image, leaving only the corners outside of the selection, for a gradual, more subtle effect.
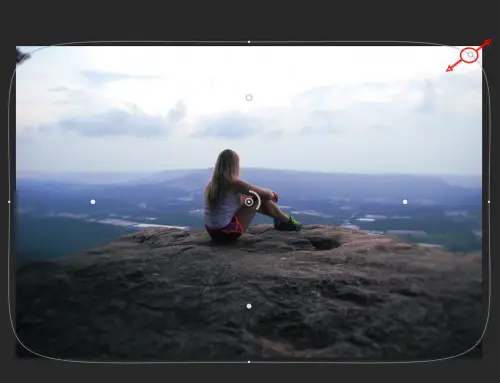
Step 4: Move the little white square in the upper-right to make the selection more rectangular or elliptical. I chose to keep the selection elliptical so that the corners would be more intensely blurred.
Step 5: Adjust the handles that look like little white circles to frame which part of the photo you want to stay sharp. The area between these handles and the selection is called the “Fade Area.” In the Fade Area, the photo will gradually change from sharp to blurry. The area within the handles is the “Sharp Area,” and will remain in full focus. The smaller you make this area, the shallower the depth of field will appear.
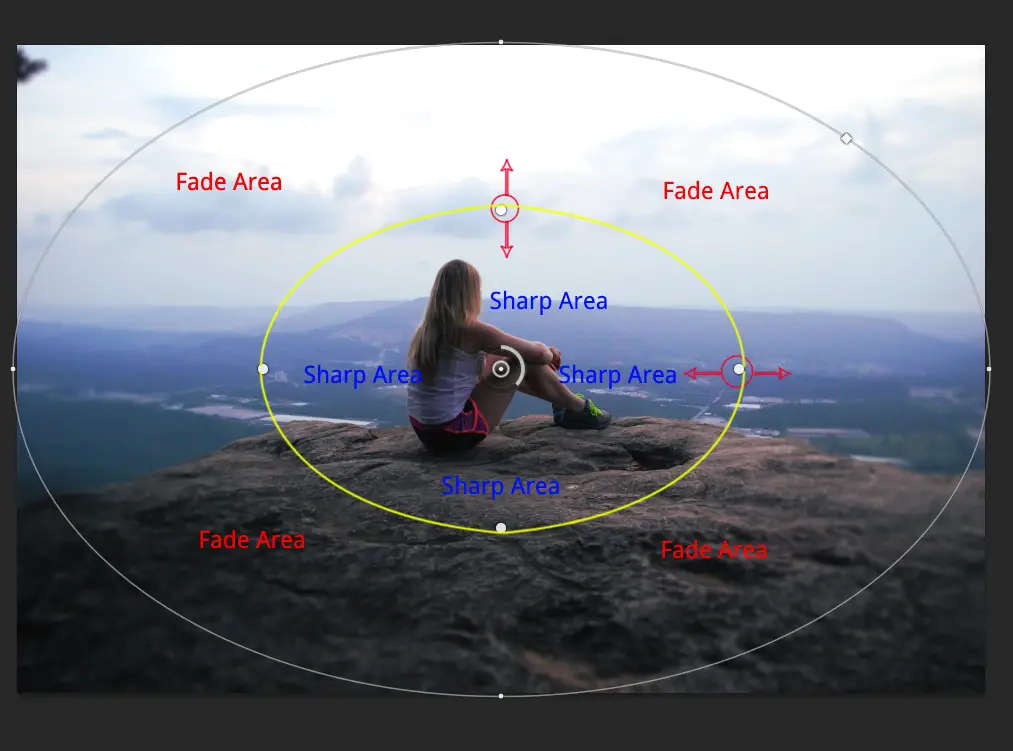
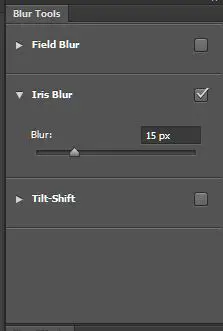
Step 6: Adjust the intensity of the blur. You can do this either by clicking inside of the thin circle in the center and dragging clock-wise, or you can use the “Blur” slider on the right. If you want to achieve a macro, or extreme “close-up” effect, you can apply a more generous blur (34 px +), but for most other types of photographs, a subtle blur of 15 px or less will look more authentic.
 ()
()
发表回复