Year 2013 is already at the door, and I still meet people who critique photos as “photoshopped” or “post-processed”, putting the very negative sense in this word. Like, “it’s not art, it’s not real, it’s not your merit”.

I don’t know if you have ever thought about it, but every single photo is post-processed. By you in Photoshop, or by point-and-shoot camera’s built-in processor, or by a film enthusiast who decides which chemicals in which amount should be used for film processing.
Starting with Instagram and ending with Adobe Photoshop, there are hundreds of tools for this.
And please, don’t say “I don’t post-process photos”. I’d recommend something like “I don’t know how to edit and process photos after I press the shutter button, so a camera processor does all the job for me, handing me in a fresh .jpg file”
So, in this post I’d like to go through the main post-processing tools, the very basic ones.
In my case, these are the basic steps I can almost never skip when post-processing a photograph.
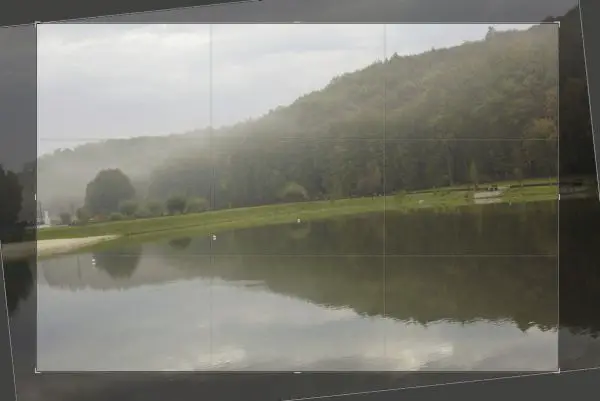
You can avoid these steps in post processing if you compose the shot and level your camera perfectly when taking a photo.
But too often you still need some adjustment afterwards – just because you did not have enough time for this at the moment of capturing an image, or because you decide to change the composition when looking at the image on the screen.
2. Brightness / Contrast
Getting the exposure right can draw the necessity of these adjustments to a minimum.
But as long as contrast is a question of personal taste, you might want to adjust it in graphic editors.
Almost every application allows you to do it – from Instagram to Photoshop.
Besides moving the “Contrast” slider, there are many “exquisite” ways to adjust the contrast of an image. In fact, it is one of the most important steps of post-processing, and may need working with masks, layers, channels etc.There are so many different ways to change image contrast:

3. Basic Color Adjustments
White Balance

To reproduce the colors of the real world correctly, a camera must “know” what color to treat as neutral grey – a grey color with no blue, yellow, red, green tint.This is a quite tricky physical question, because… there is no such thing as “neutral grey color”.
There are no grays, no blacks and no whites at all in reality. Just like there is no love and no friendship and no social security. These are notions we just have in our mind.
According to Wikipedia, White is the color of pure snow or milk. It is the color of light that contains all of the wavelengths of the visible spectrum without absorption. It is the opposite of black.
Everything we see in this world – is light, which comes from a light source and is reflected by the objects of the reality.
So, if we see a grey piece of paper, it only means that this piece of paper reflects all the components of a color spectrum equally. Unlike a red piece of paper, which will absorb all other colors and reflect only the “red” part of it.
But. This grey paper reflects the light of a light source, and different light sources have different color temperatures [wiki].
A grey piece of paper will actually look different depending on the light source it reflects.
Coming back to the camera and its settings – a camera must “know” which light coming onto the photo sensor, must be considered as “neutral gray”, and based on this knowledge, all other colors will be also treated differently, having this gray as a starting point.
An ideal variant of having a proper color balance in an image is actually measuring the white balance with the help of a special grey card, which you must photograph and tell the camera through its settings that “this color is neutral”.
But, this is mostly for serious professionals and photo nerds.
In our case, we would just set appropriate White Balance settings in our camera’s menu, or even leave Auto White Balance.
Then, when post processing, we might want to make sure that this balance is correct, by finding some “grey” object within a frame and making sure that it is “grey” in the values of the Red-Green-Blue colors which are used for color reproduction in computer screens.
A perfectly grey object will have equal color values of Red, Green, Blue – for example, 175, 175, 175. You can check these values with the help of an eye-dropper tool in Photoshop or Lightroom or any other more or less profound editing software.
Next thing is Saturation.
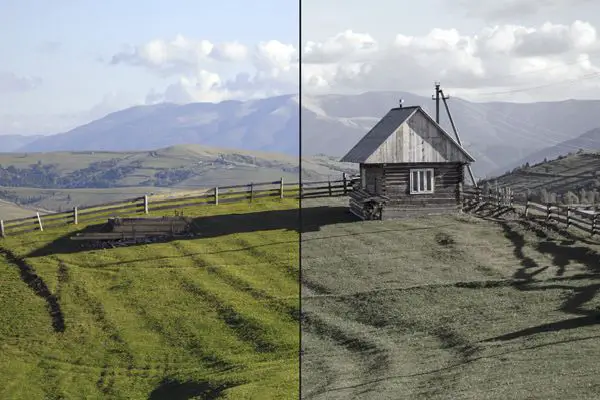
Saturation, the intensity of colors, can also be set in camera settings. But I personally find the way in-camera adjustments affect vibrance too aggressive.
So you might want to adjust it later in an editor, having more control. You will also be able to adjust the saturation of different zones of the photograph differently.
Color Balance and Selective Color adjustment.
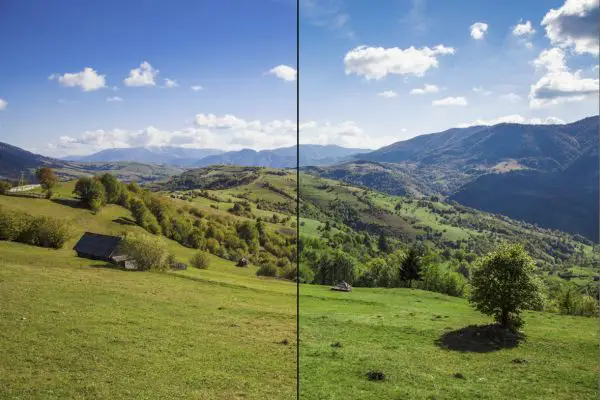
These tools require slightly more experience, but they are vital to master.With their help you can affect a specific tonal range or a specific color, leaving other tones and colors intact.
If you, for example, want to make shadows cooler keeping the highlights just as they are, Color Balance tool is something you need.Or you may want to adjust the skin tones, but keep the other colors. Here goes Selective Color tool.
Different editors may have different names for these tools. But but the majority of professional editors have options for affecting only a small range of colors, or a range of tones.
Lightroom supports presets, which allow dramatic color optimization by one single click, which is absolutely awesome for batch editing and for experimenting in general.
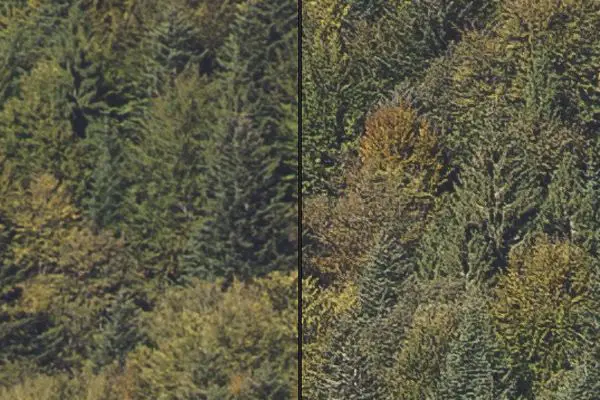
Technically speaking, sharpness is the amount of contrast between adjacent pixels – that’s it.
Even if the photo is in perfect focus, this pixel contrast may need optimization – this is an almost necessary step in post processing.
You might need different approaches to sharpening for different sizes – web, or print.
Some editors have a simple “Sharpen” function, which makes it perfectly simple, without the need of adjusting numerous settings.But editors like Lightroom or Photoshop give you many ways to sharpen the image, using different algorithms.
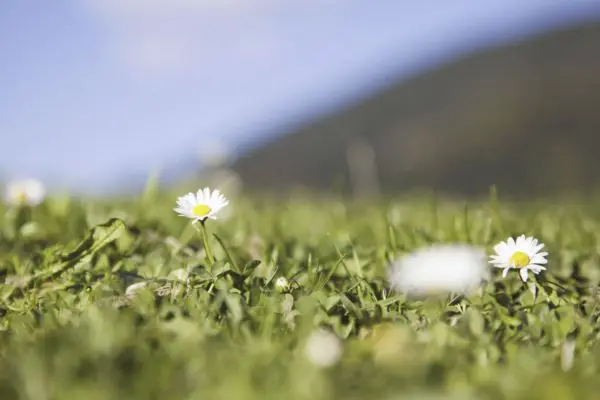
Natural blur in photos is achieved just because of optics laws.
Objects which are in focus will be sharp, while those out of focal distance will be more or less blurred depending of the distance, aperture value etc.
Putting a sharp subject against a rough unsharp background is a common artistic practice, but it usually requires some financial effort, as the best results are achieved with quite not-so-cheap lenses.
That is why some extra blur may be achieved by software plugins and filters.
But please be careful with this, as artificial blurring looks “plastic” most of the time, but still it can be a nice enhancement to a smartphone photograph, which just can’t have a shallow depth of field.
However, if you strive for artistic value, the best option here is the most expensive as well – getting good lenses with low aperture values (like f1.4 to f2.8).Or, you can try borrowing one, at sites like Borrowlenses.com
This list can go on and on for quite a while, but I just wanted to draw out the essentials, hopefully it was of some help to those of you who only start to discover the magic of photo editing ?? ()

发表回复